Pools are a great way to cool off during the hot summer months, but there are times when you just can’t enjoy it. Whether your pool doesn’t have enough sun exposure or is in an area that usually gets cold at night, keeping warm water requires heating your swimming pool.
Installing a pool heater is a relatively simple process that only takes about two hours once you have all of the necessary materials and tools on hand. We’ve put together this step-by-step guide for anyone looking to install their pool heater.
Getting ready for heater installation
Before proceeding with the installation of the heater, make sure that all dirt, debris, stones, roots, etc. are removed from this area and that the ground is relatively level.
If you have had a heater before, you should take out it. When removing a propane heater, make sure there is no gas in the line before attempting to off it.
Also, make sure all items such as gas lines and electrical wires are removed from the area before proceeding with the installation.
Once you have prepared the location for your pool heater, it’s time to install a new pool heater.
How to install a pool heater
The installation process can be done by any homeowner. If you’re determined to install a heater yourself, just follow these simple steps:
Choose your heater
Pool heaters are available in both gas and electric types. You can choose the best one according to your budget, taste, or pool characteristics. A gas heater is great if you need an extremely efficient device that will save up on energy expenses. On the other hand, a more expensive electric model may be worth it due to its safety factor.
For a pool of fewer than 100 gallons, a small pool heater will do. Larger pools require more powerful heaters that can produce enough warmth to cover the entire surface of your pool.
When it comes to the energy source of your heater, you may opt for natural gas or propane. However, if electricity is more accessible in your area and you don’t mind spending extra on operating costs then an electric pool heater might be just what you need.
Find a suitable installation location

The next step to installing a pool heater is to decide where you’re going to put it. This will largely depend on the size and shape of your swimming pool, as well as how much space there is around it for manoeuvring tools and equipment. For example, if the back portion of your yard has very little room between structures or trees, then you’ll likely need to place the heater closer toward the front.
If you’re unsure about where to begin, think of the area as a three-dimensional map.
Start with your pool’s dimensions and then add an extra foot on all sides (to account for moving around equipment). Next, draw out that shape using chalk or tape. If there is room between structures or trees in this zone – excellent!
Once you’ve decided where to place the heater – mark out some boundaries. For instance, you can use string to outline the pool’s perimeter and then place flags or cones in the space you’ve chosen for installation. This is an easy way to prevent yourself from making any mistakes when it comes time to install your heater.
If the under-pool heater is installed properly, it will provide heat to your pool for several months. To guarantee that it operates at its highest efficiency, you’ll want to keep the area around the pool completely clear of obstacles such as chairs and tables (this will also make cleaning easier). Furthermore, be sure not to block access between your heater’s power cord and an outlet.
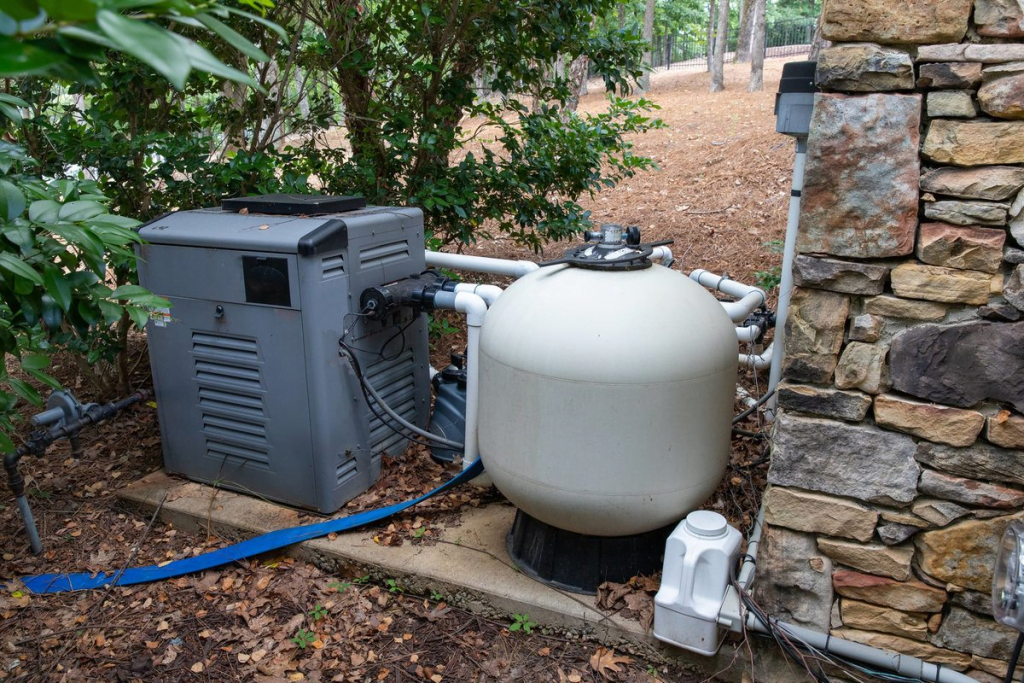
Install the equipment pad
Dig a hole for the equipment pad, which will be used to secure all of the pool heater components in place. Make sure that it is large enough and deep enough so that everything can fit together properly – but not too big or else you’ll have problems with stability.
Place the electrical junction box on top of your installation area, right above where you will be burying all of the piping. Use a marker to outline where you will be digging the hole.
The next step is to place in and connect your pool heater components – namely, cables from both the equipment pad and the electrical junction box, as well as a gas line from your regulator.
Once everything is connected properly to all of its corresponding parts you will need to secure the equipment pad to your installation area. Use a hammer and nails or screws depending on what you have available, as well as additional materials such as concrete mix if necessary for extra stability.
When finished, use a spray paint can to mark out where the pipe entrance and exit points are so that you do not accidentally damage anything while digging. Turn on your gas line shut-off valve, go outside with some soap water (or dish soap), and follow the painted lines until all of the ways around your equipment pad area. You may also need to use string or chalk instead depending on what material is easier for marking in this location.
Connect the swimming pool heater
The final step is to connect the heater itself. Make sure that all of your tools and equipment are out of the way before you turn on anything!
First, use a wrench or ratchet set with a socket attachment to tighten down onto each component’s connection points – do not over-tighten them since this can damage components such as pipes and valves! We recommend using Teflon tape at both ends so that there will be no leaks when connected: it also allows for easy future disassembly if necessary.
Make sure any extra pieces (such as unions) have been added correctly by checking which direction they need to rotate for water to flow through them after everything has been connected properly.
Once all of the connections have been made, turn on your pool heater by turning off any shut-off valves and slowly opening up gas lines. There should be no leaks if everything was connected properly.
Indoor pool heaters
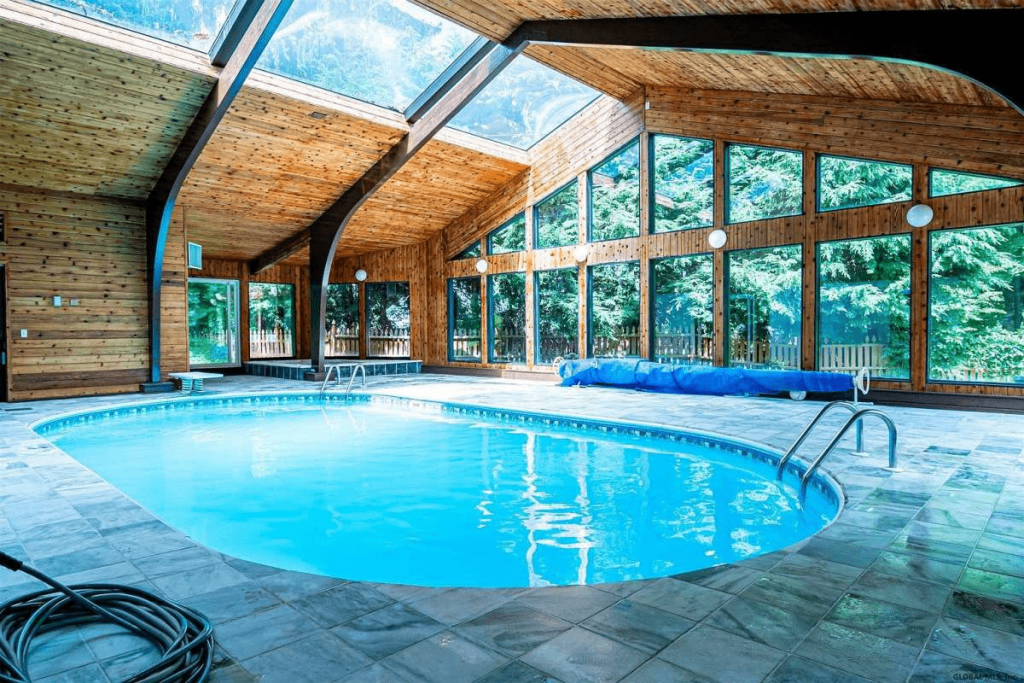
An indoor pool heater is a great way to extend your swimming season. But before we get into how to install one indoors lets first take a look at some things that should factor into your decision:
- The size of your backyard or space available where you plan on setting up the heater
If it’s too small it may not provide enough heat just like if it’s too large then there might not be many benefits from doing so. For example, if you only have room for about three feet between the heater and your pool then you may not get much of a temperature increase.
- The type of swimming season you have
In some parts of the country, especially areas with very cold winters it might be best to install an indoor heater so that people can still enjoy their pools for months instead of weeks or even days before temperatures drop. In warmer climates where it’s sunny year-round, however, installing one makes less sense because outdoor pools provide plenty enough heat without issue. You will need to take into account how many hours per day during which periods you plan on heating the water because this will impact how often you’ll likely turn them off if at all at certain times throughout the week/year when using your pool won’t require additional heat from a heater.
- The budget available for a pool heater installation
Most people can’t afford to install an expensive, heavy-duty system with all the bells and whistles so they’ll have to decide between going smaller or investing in something more powerful.
After taking these things into consideration chances are clear whether installing an indoor pool heater makes sense or not.
How to install an indoor pool heater:
Step 1: Acquire a pool heater
There are many different types and sizes of heaters available on the market so make sure to do some research before buying one. Make sure it is large enough capacity-wise for your needs. Also, look at what material it is made out of as this can affect its effectiveness in terms of energy usage and heating ability (i.e., steel vs copper).
Step 2: Determine placement of the unit
After receiving your unit you can begin to set it up. Make sure you read the directions carefully and consult with a professional if necessary as this is not an easy task for everyone given that some pool heaters are quite heavy, difficult to maneuver through tight spaces or require special wiring which may be dangerous unless done by someone who knows what they’re doing.
Step 3: Connect the unit
This part of the process will vary depending on your particular unit so refer back to its manual or contact customer service should you have any questions about how exactly to go about connecting yours properly.
Step 4: Fill your pool with water and turn on the heater
Once everything has been connected simply fill your pool water and turn on the heater.
Step 5: Enjoy your warm pool
Once your heater is on and you’ve filled the pool with water, it’s time to enjoy a warm swim!
Installation tips
We have included a list of helpful tips to consider when installing your pool heater:
- Many people think that they need to drain their pool before installing a heater.
This is not true! Draining the pool will make it harder to monitor and install your new heater.
- Make sure you have enough space for your new heater.
You should measure how much space you have in your pool so that the heater doesn’t get caught on anything when it’s installed.
- Not to block any of the filters or other equipment while installing your new heater.
Make sure there is plenty of open space around all sides and at least 18 inches above where it will be placed because heat rises. If you don’t leave enough room for airflow surrounding the heater, then expect problems with corrosion and rust.
- If the heater has an electrical cord, make sure it is long enough so it can reach your outlets.
Otherwise, you’ll need to hire an electrician and that will cost more money than just buying a heater with the proper cord length.
- If you’re using natural gas or propane as your fuel source for your new pool heater then you mustn’t install it inside of your house.
If you nevertheless decide to install it indoors, then make sure there is also plenty of ventilation so carbon monoxide cannot build up in the room where the unit is operating. This can cause serious health problems and even death if ignored – please don’t take this warning lightly!
6. Use enough Teflon tape when connecting the pipes at the joints and fittings.
In case of improper sealing, gas or water may leak, which can cause problems with the pool heater, and also pose a safety risk to you and everyone who is near this area during the installation process.
7. Make sure all electrical connections are secure before starting up your unit during installation processes.
Do not tighten any screws until everything is ready to go, because tightening too early could cause problems with how things fit together – which may lead to leaks or other issues down the line.
Summary
A pool heater is an excellent addition to any in-ground or above-ground swimming pool.
They are typically used to maintain the pool’s temperature during periods of cold weather. The heater uses either natural gas or electricity as a power source.
A properly installed and serviced piece of equipment will keep your water temperature at a comfortable level even on the coldest days when you want to be able to swim without freezing!
As with any appliance, however, installing a pool heater yourself is not something to be taken lightly. It can be done by the homeowner but should only be attempted if you have experience with home improvement projects.
FAQ
🙉 Are pool heaters loud?
No, pool heaters are not loud. They aren’t even very noisy at all compared to some appliances you have around your home.
👨🔧 Can I install the pool heater myself?
Yes. Pool heaters are fairly easy to install yourself if you have a background in wiring or plumbing.
⏳ How long does it take to heat my pool?
It depends on the size of your pool, but most units can raise water temperature by approximately 15 degrees per hour. This means that a small in-ground or above-ground pool (like you might have at home) will be ready to swim in within about 12 hours!
❓ What are the drawbacks of a gas pool heater?
One issue that can come up with a gas heater is maintaining proper ventilation. Another drawback may cost as some units tend to burn more fuel. And finally, any sort of gas backup heating system should only be used by professionals who know what they’re doing. Otherwise, there could be serious consequences from misuse or missteps during installation.
🧐 What are the drawbacks of an electric pool heater?
One drawback that can come up is cost. While most use less electricity than gas heaters, they’re also more expensive to purchase and install. Another issue may be if there is a power outage or problem during normal operation; this could cause damage to the unit which will result in costly repairs.